Filter PCAPs using complex criteria
Learn how to filter large PCAP captures in Squey with complex criteria using parallel coordinates, then export isolated packets and TCP streams to PCAP files.

You’re not sure what data your packet capture is really containing and it is too big to be opened with Wireshark or other tools? Visualize it using Squey, isolate packets or sessions worth of interest with arbitrary complexe criteria and then export it to smaller PCAP file(s).
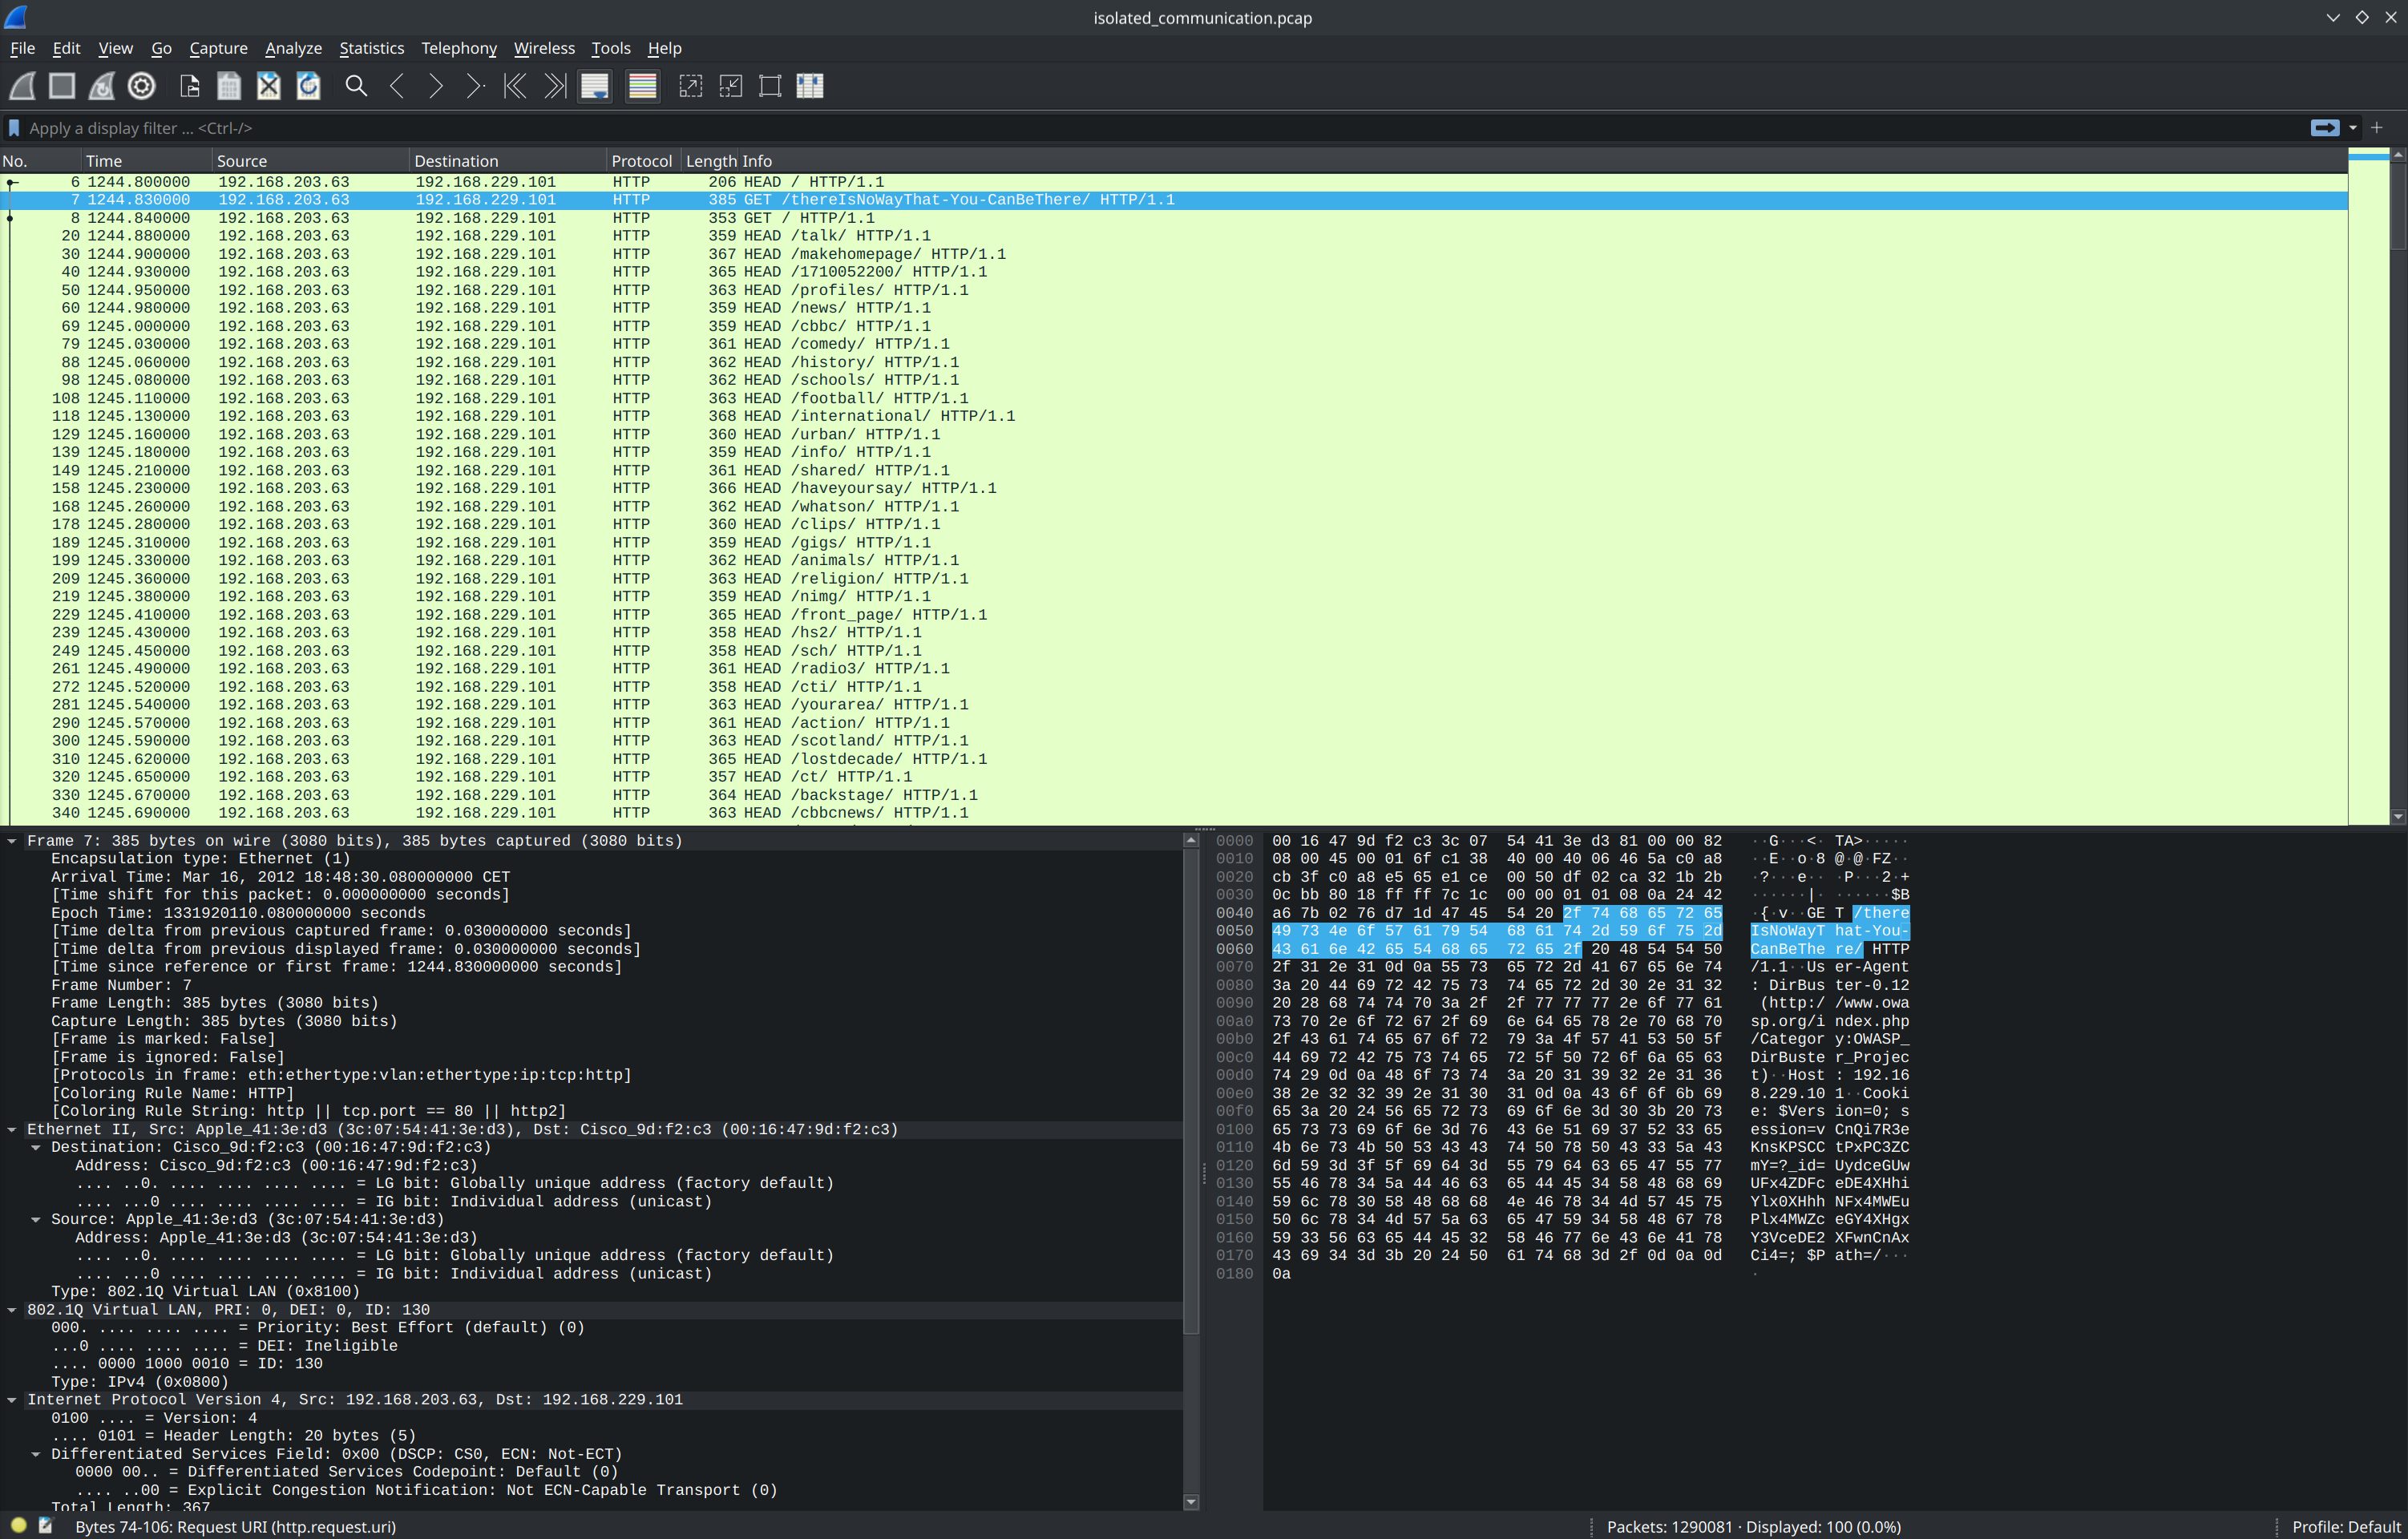
As an example, we will load the complete MACCDC 2012 PCAP dataset composed of 17 files (~17GB) and export HTTP communications between IPs 192.168.203.63 and 192.168.229.101 on port 80.
Loading packet captures
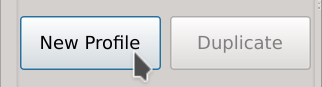
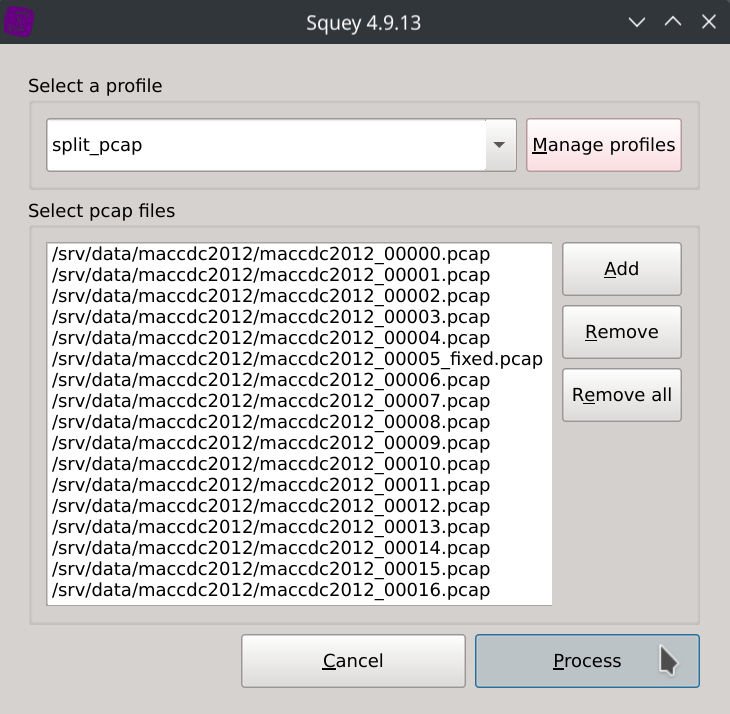
Click on the Pcap... button under the SOURCES section of the start page and click on the Manage profiles button.


First, let choose the packet fields we would like to use to make our filtering. Almost all fields supported by Wireshark are available, but keep in mind that the more fields you choose, the slower the packet captures will be loading and the bigger the space in RAM will also be.
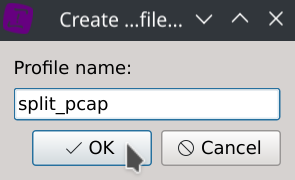
Click on New profile, enter the profile name of your choice and click Ok.
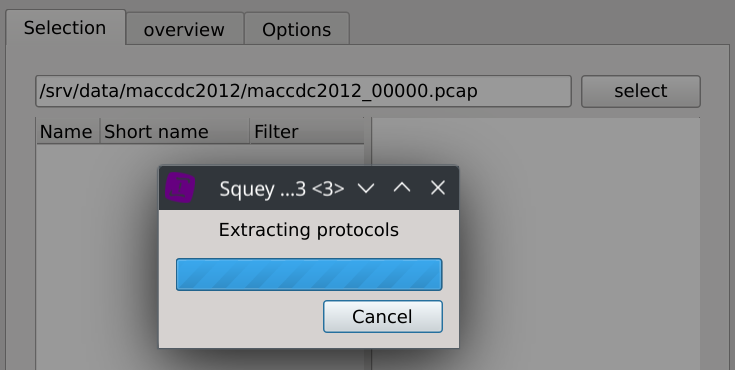
Then click Select and browse one of the PCAP of the dataset.

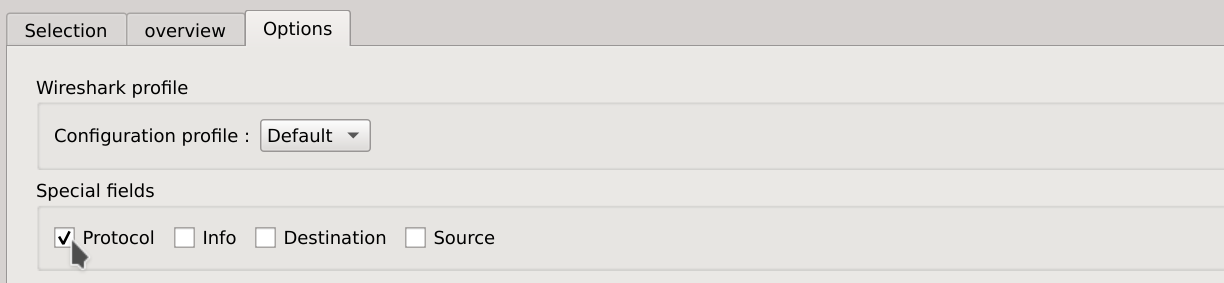
For this exemple we chose the following fields:
frame.time, eth.dst, eth.src, ip.dst, ip.src, tcp.srcport, tcp.dstport
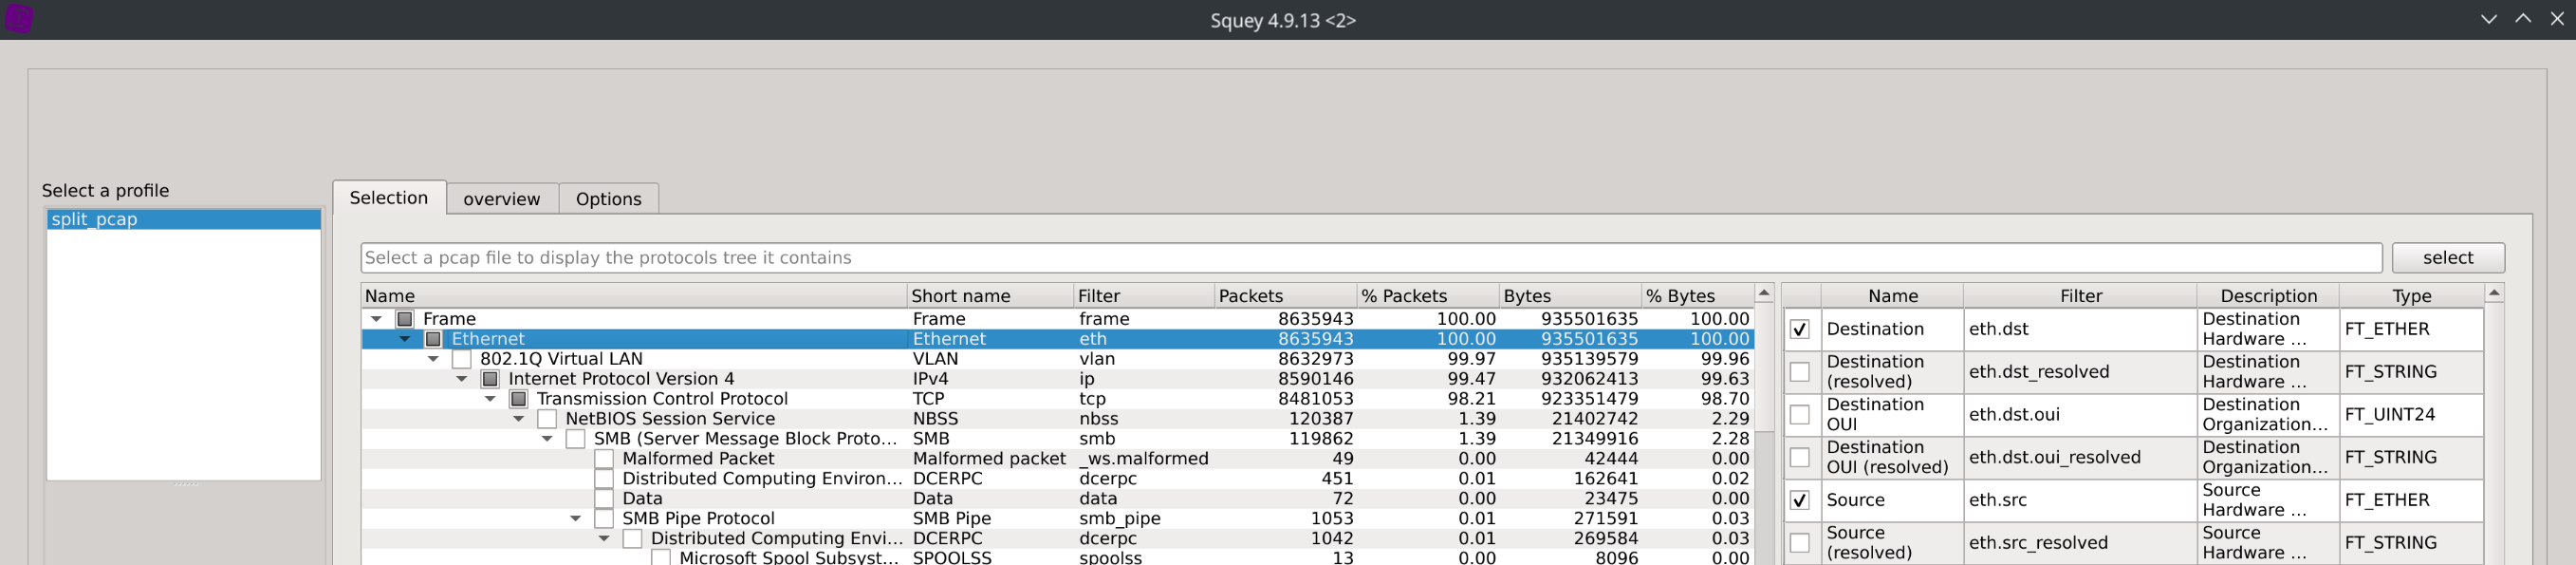
And we also checked the Protocol field in the Options tab.
Save your profile and load the packets capture using the newly created profile.
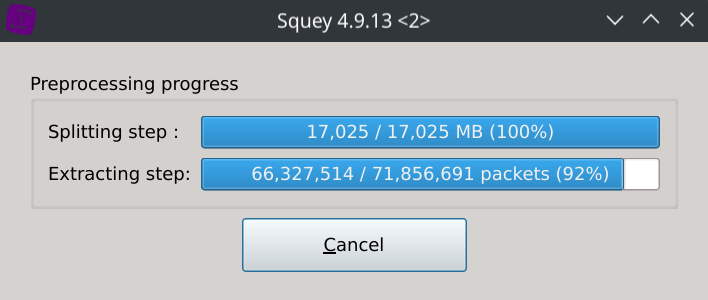
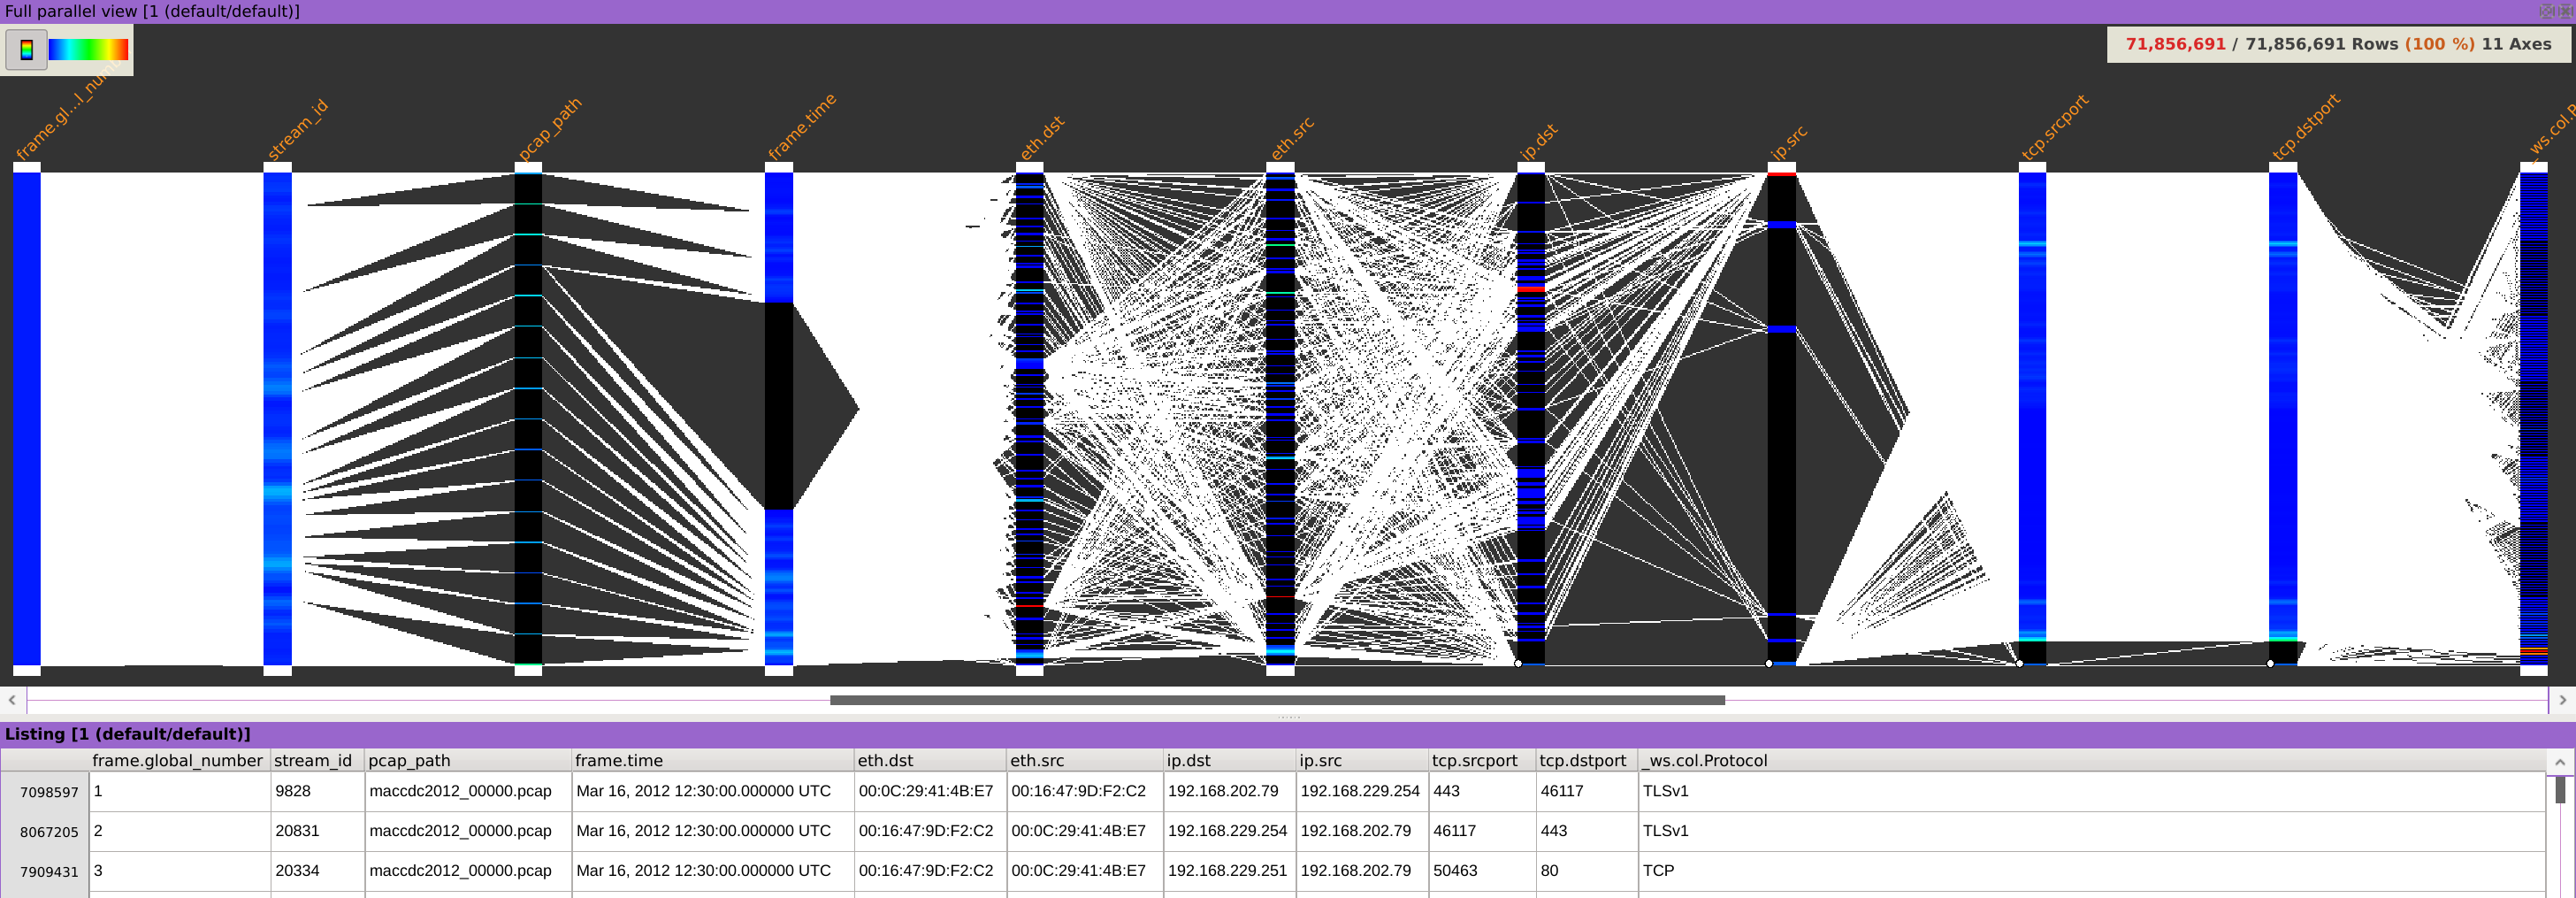
The packet captures should now be displayed using parallel coordinates with the fields you selected as columns.
Isolating packets
In order to isolate this communication, we will successively apply 4 stages of filtering:
- Filtering packets using HTTP protocol
- Filtering packets to IPs 192.168.229.101 and 192.168.203.63
- Filtering packets from IPs 192.168.229.101 and 192.168.203.63
- Filtering packets on destination port 80
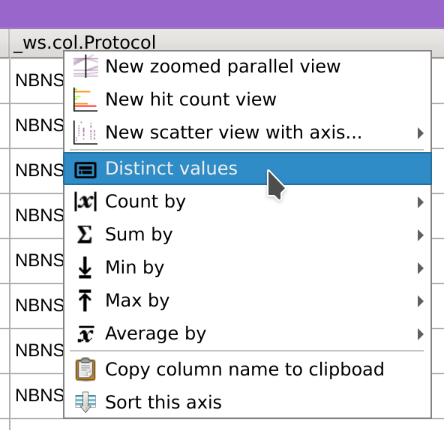
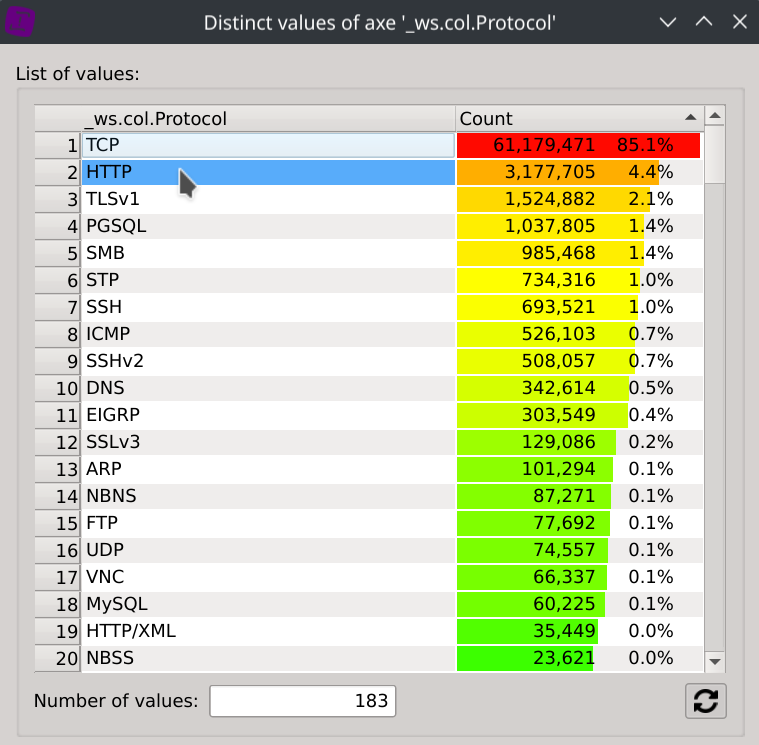
- Right-click on the
_ws.col.Protocolcolumn header, selectDistinct values, click onHTTPand close the dialog.
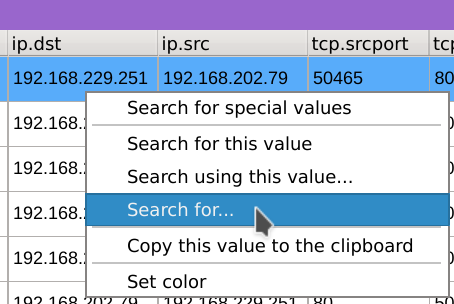
- Right-click on any value of the
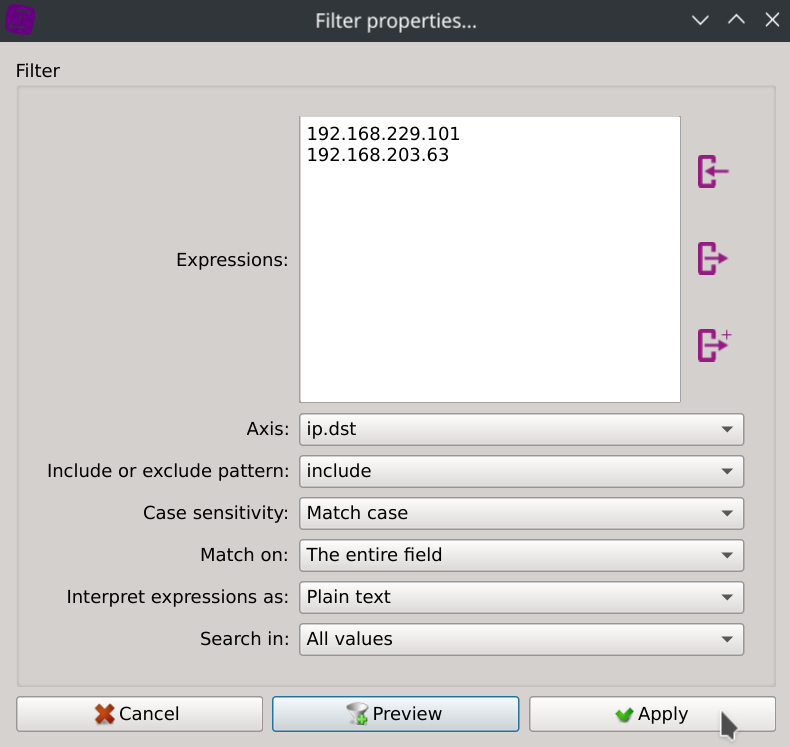
ip.dstcolumn, selectSearch for...paste the two IPs addresses located below and clickApply.
192.168.229.101
192.168.203.63
Repeat the same filtering operation on the
ip.srccolumn.Right-click on the
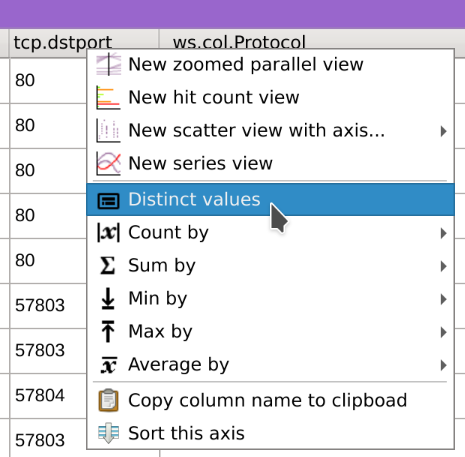
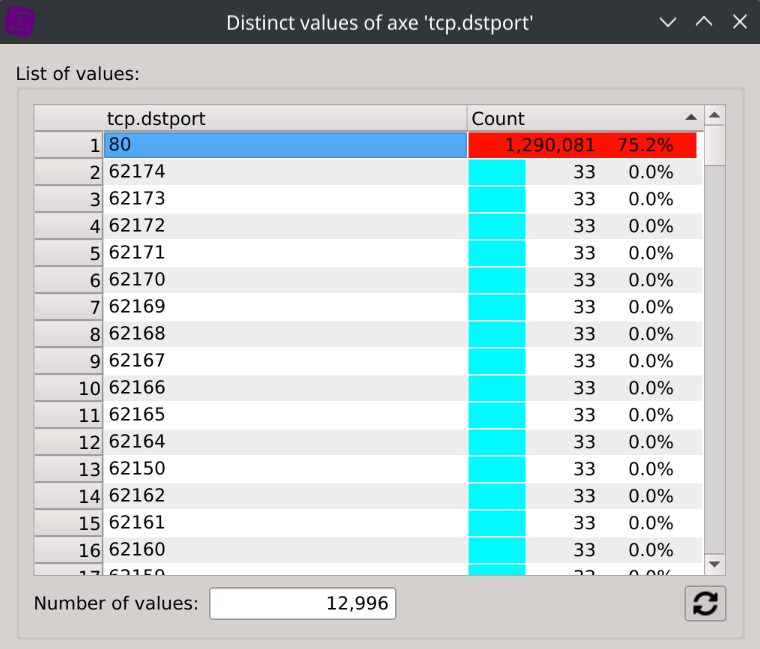
tcp.dstportcolumn header, selectDistinct values, click on80and close the dialog.
Exporting isolated packets
Now that the communication is properly isolated, time to export it back as a PCAP file.

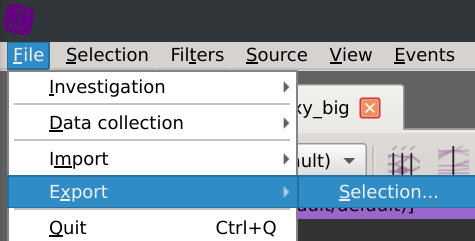
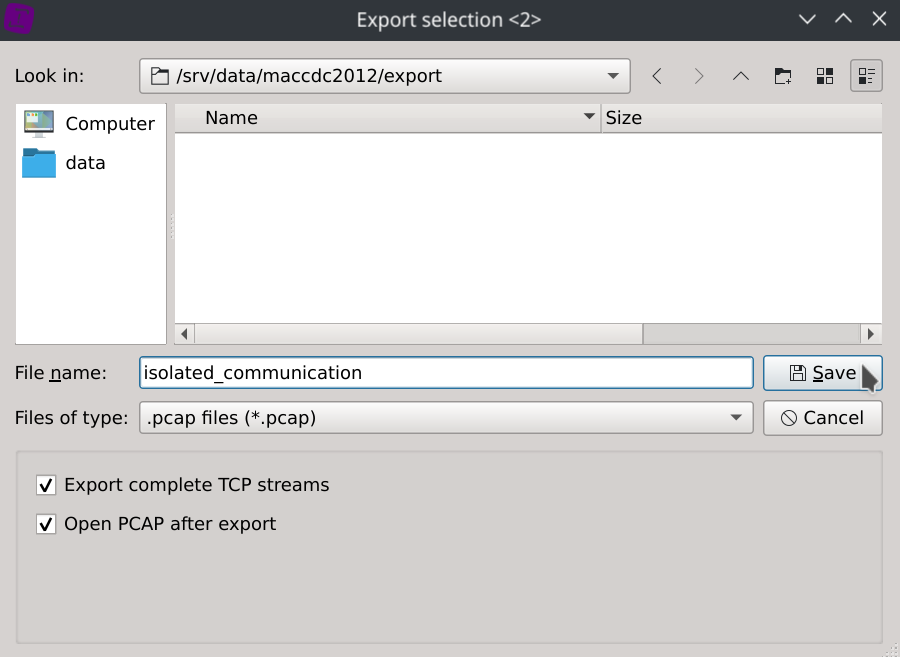
Click File > Export > Selection... and save the PCAP wherever you want.
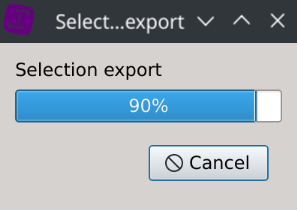
The application has just filtered the packets contained in the original PCAP files.
The default option Export complete TCP steams will also export the entire session a packet belongs to.
You can now open the exported PCAP with Wireshark or your favorite tools.
Saving the investigation for faster reloads
If you want to avoid the loading time of the packet captures, saving it as an investigation will let you reload it very quickly (in less than 6 seconds on an Intel® Core™ i7-12700H Processor using ~3.6GB of data on disk).
Click File > Investigation > Save investigation (or Ctrl+S) and select the folder you want to save your investigation to.
Note that the actual data of the investigation will still be located in the application temporary directory.

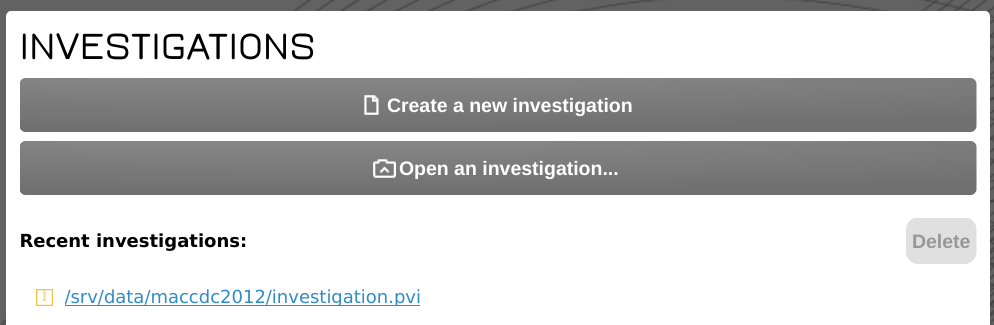
The investigation will then appear under the INVESTIGATIONS section of the start page as a clickable link.
Deleting the investigation to free up disk space
Tick the investigation checkbox, click Delete and chose Delete investigation.

Disk space will automatically be reclaimed during application next loading.